Spot Metering
Chapter 4
One of my earliest difficulties with the Zone system was how to use my average meter to implement this system. The truth is it is next to impossible (though the next chapter gives some ideas how thi s can be possible). An average meter takes a wide view of the scene typically 30 degrees whereas a spot meter measures light across a 1-5 degrees.
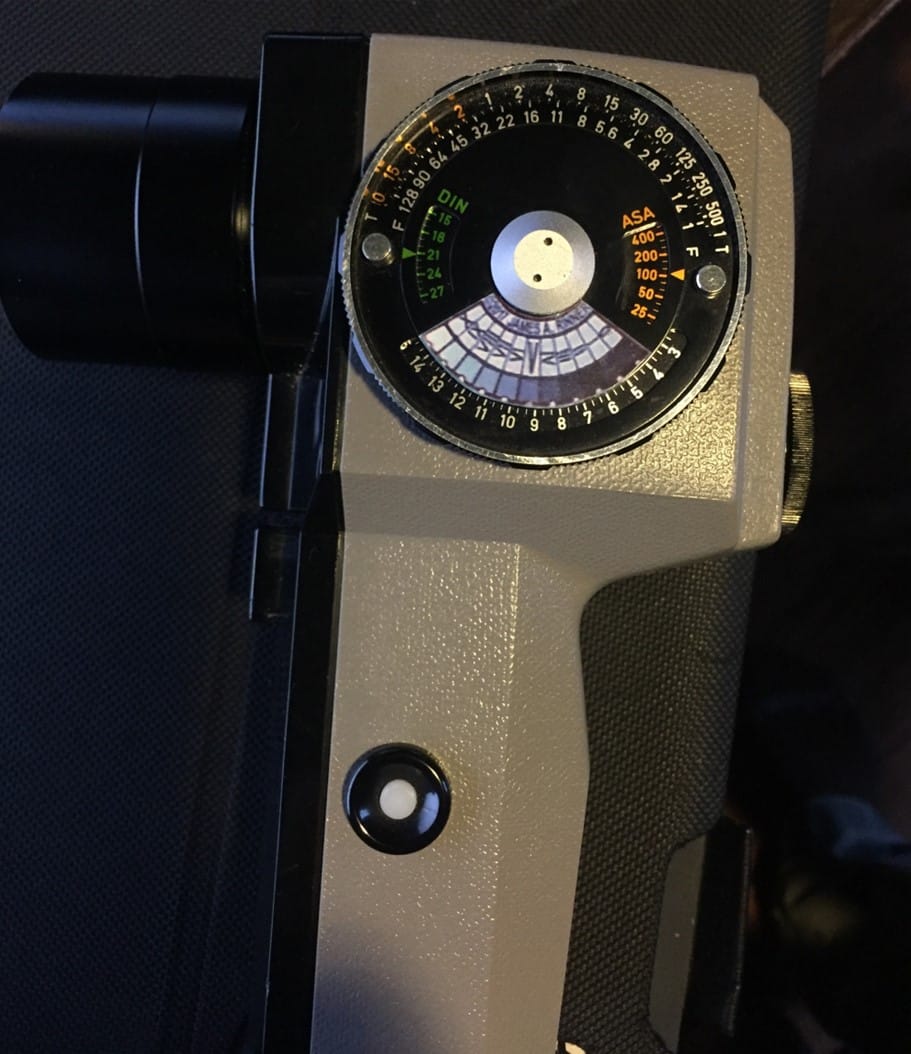
It is my understanding that when Pentax introduced their first spot meter the zone system became practical. The meter consists of a small telescope optical system and the meter reading is reflected into the field of view. A small circle in the field of view indicates where the meter is reading from. You place this circle over the area of interest and pull the trigger, then read the Ev from the meter in the field of view.
That number is used to set the dial on the side of the meter to determine the shutter speed and aperture.
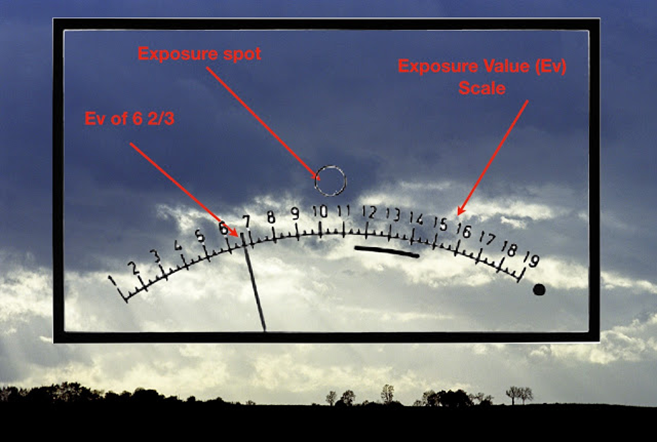
the example on the dial above the Ev has been set to 4 (bottom scale) and this means that f11 at 8 seconds and f4 at 1 second are couple of many possible exposures. Indeed, any combination of apertures and shutter speeds that line up will give the same exposure. To my mind, this is why these meters are superior to more modern digital versions. Pentax and others made digital versions but all this means is you could read a number and not a meter needle. In both cases you got an Ev reading to apply to a dial to determine the valid aperture and shutter combinations. The key is you see all the combinations laid out at once. (And you don’t have to go scrolling through the combinations on some LCD screen.)
Note that on these older meters you set the film or sensor ISO on the dial. So the Ev in this sense is independent of ISO. Technically Ev is specified with an intended ISO. Modern spot meters have the ISO selected and present single aperture and shutter speed value.
Once you come to terms with how the meter operates then the next step is the application ot the zone system.
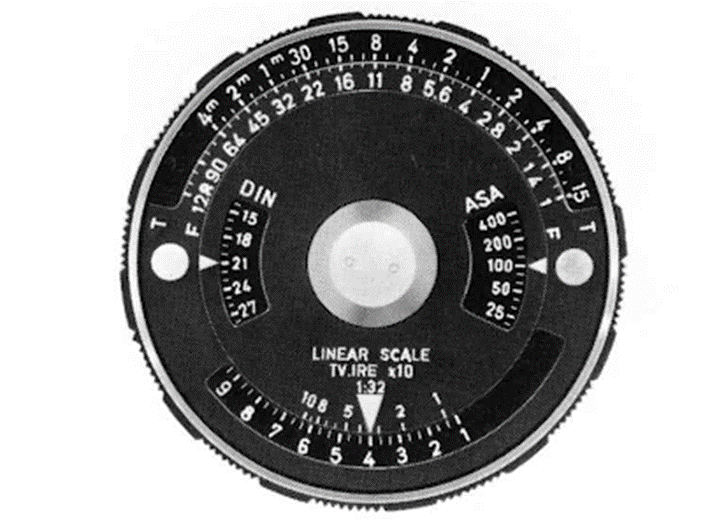
One of the first things people with a spot meter who use the zone system do is attach a zone dial to the meter like the one shown below. This made the meter infinitely easier to use. They are easy enough to make and I still wonder why they weren’t offered this way from the manufacturer.
Zone V sits right over the arrow on the original dial as these both indicate the 18% gray reference. Light exposures go to the left and darker to the right. Now you are ready to use the power of the Zone system.
The Zone System in Use
I want to use an example to understand the limitation of average metering. To do this I will use an old digital camera (Fuji X10) as it allows me to quickly construct the examples without waiting for film processing. Later I will show the same concepts though using real film. I also chose to shoot them as black and white images as I feel this helps convey the idea of lighting and tones without confusing the eye with colors. The same principles apply if the images were color however. All photos have the camera locked to ISO 100 (as is the spotmeter) so only the shutter and aperture represent the exposure. The photos have not been adjusted in Photoshop unless declared so. They are direct from the camera.
The scenes I chose are without any real interest and are ones I can observe outside my window on a cold winter day. I apologize but this is entirely for my own comfort. The point is the same even if the location is not exotic.
Average Metering
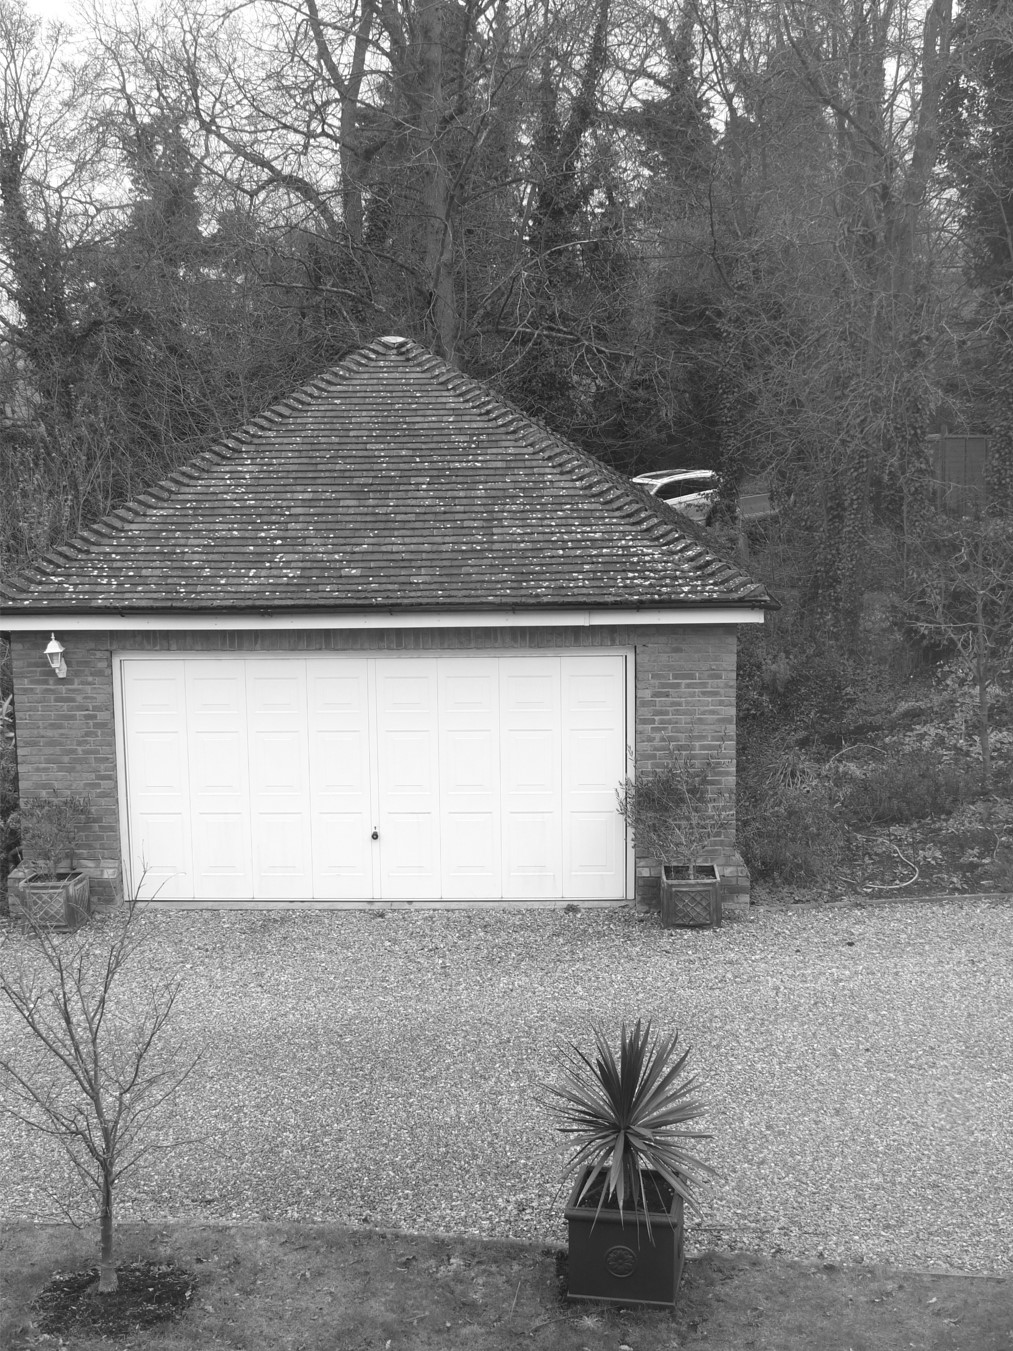
The first image I made after I composed the scene was metered using the camera’s average meter mode. I used my Sekonic handheld digital light meter (also an average light meter) to confirm the same exposure (f4 1/250).
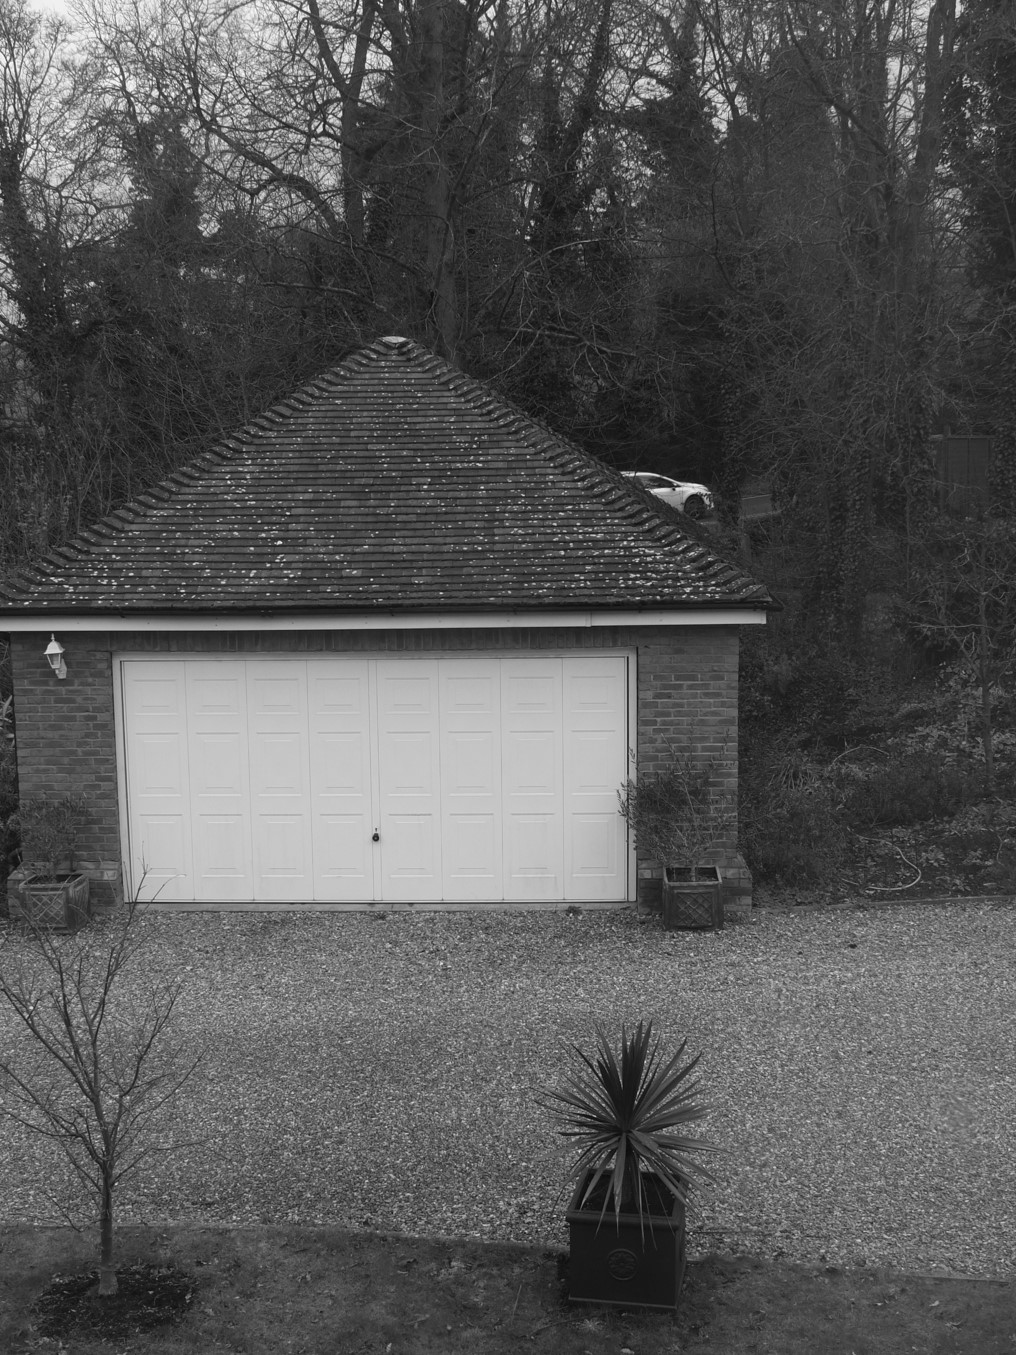
The meter and camera did a good job at getting an exposure. It is a gray overcast day, so the light is not very contrasty. The highlights are contained, and shadows appear intact and not too black or ‘blocked up’. The garage door, however, is not white. It is a light gray. If this were whitewater in a waterfall or snow the image would be unimpressive. Who likes gray water or snow? This is the problem with average metering, the meter (or meter in the camera) does not know anything about the scene or how you want to represent it.
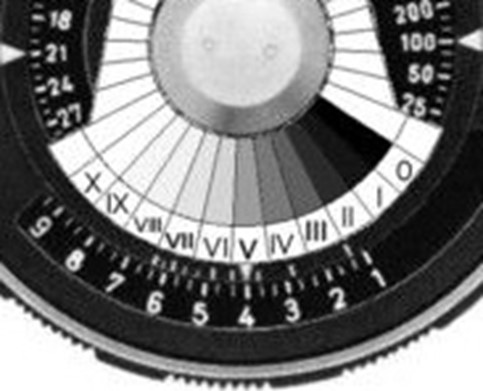
How do we get the garage door whiter? First let’s go back to the introduction to the Zone System and look at the zones again. The descriptions help and we see that zone VII or VIII show where the whiter tones should be. I choose zone VII as where I want the garage door to be.

If I could meter just the garage door then I could expose the whole image properly. Here we bring out the spot meter. Now I can just meter the garage door. I get an Ev of about 13 on my meter on this occasion. If I set my meter dial to this Ev I get the following image.
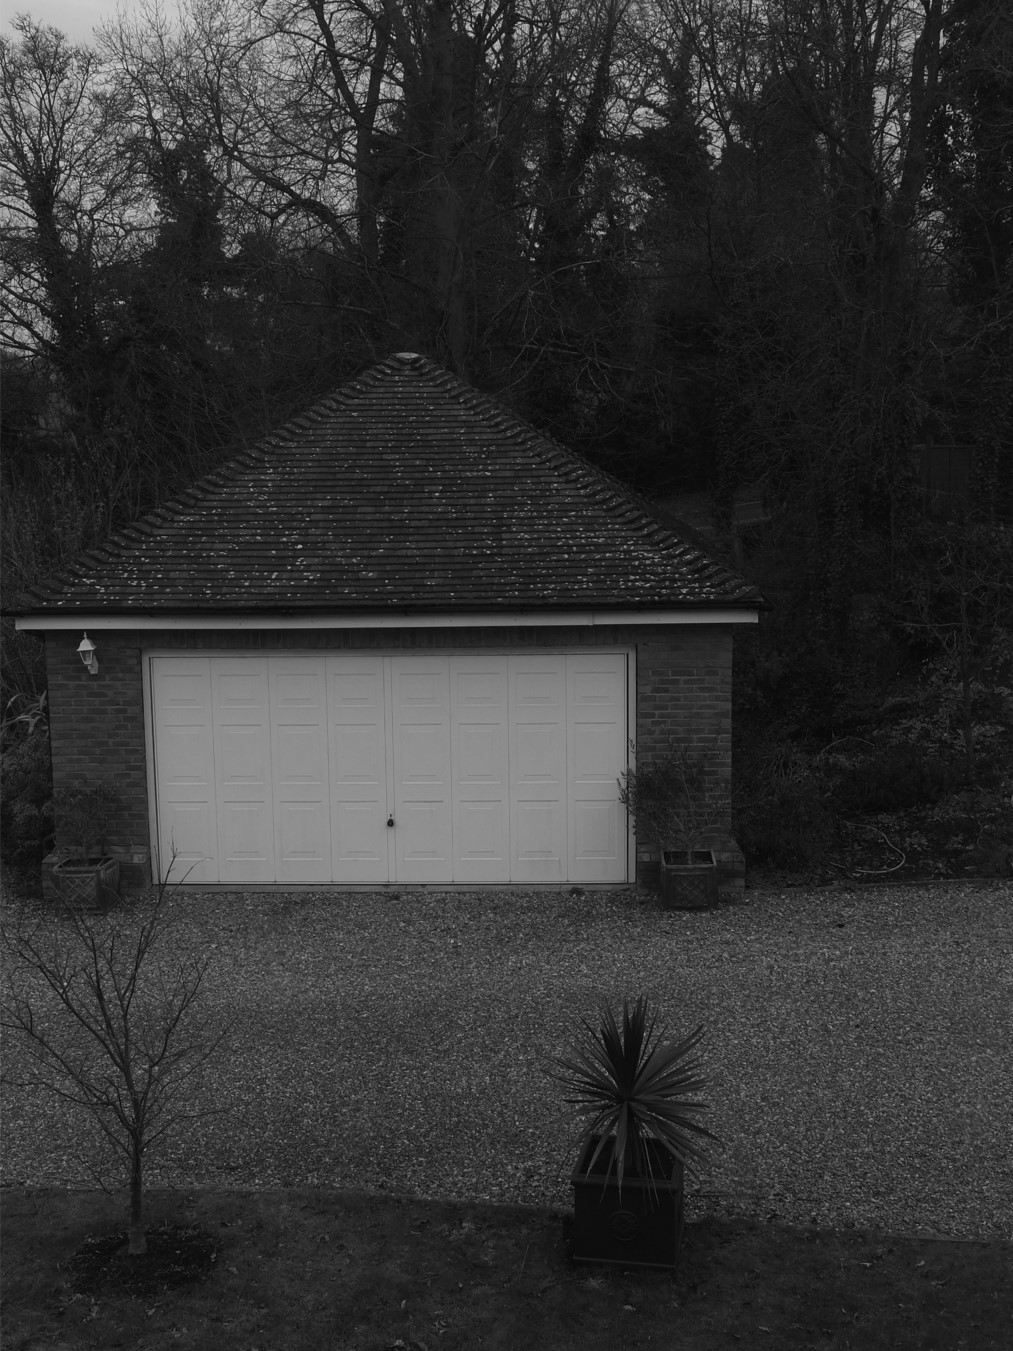
So what happened here? Looking at the Zone table again we see that Zone V is the 18% gray value we referenced before. The camera and sensor did exactly what we should expect. It rendered the white door gray. We wanted white and we know that requires us to set the exposure to Zone VII as discussed above. (If you are wondering why this image above is darker than the one prior even though the aperture is more open, the answer is the light changed over time with cloud cover.
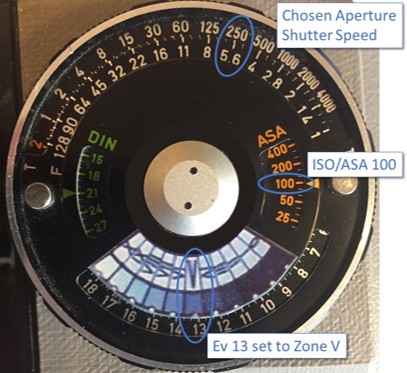
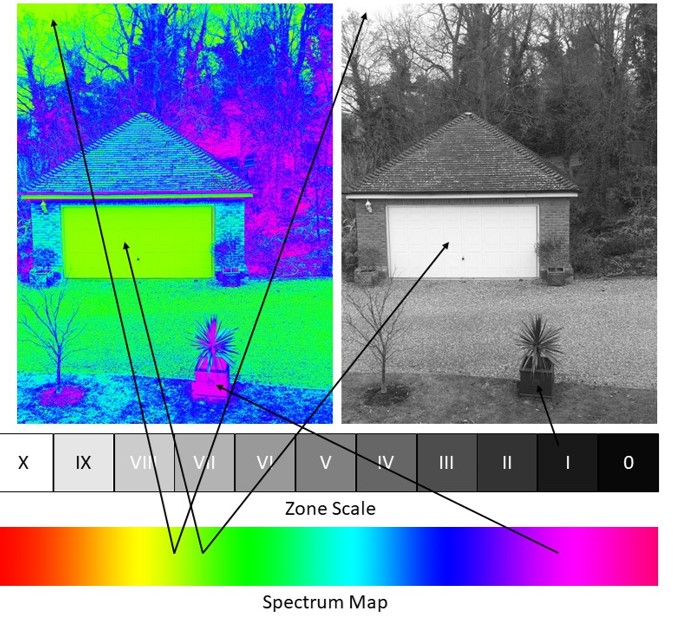
In the figure below I have ‘placed’ the Ev (13) I measured on the door onto zone VII using the zone scale I added to the meter. The added zone scale is a visual aid. It is also a simple matter to know that zone VII is two stops overexposed from Zone V. We can see this if we look at the previous figure we see the shutter speed is the same, but the aperture is f 5.6 which is two stops smaller in size from f2.8.
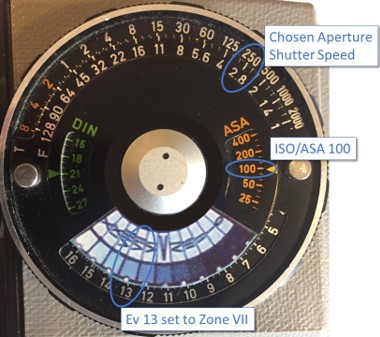
This is much more satisfactory as the door looks white. The photo overall, benefits from more exposure. The shadows contain more detail and the highlights in the sky are not too blown out (overexposed) (though it is probably a result of the overcast day).
Examining Exposure Across the Zones
To aid in understanding I made this graphic that takes the image above and maps the tones or brightness values like a heat map. The brightest parts of the image are towards the red end of this spectrum which is where Zone X and the shadows or dark portions are shown in magenta for Zone 0 and the intermediate colors show the brightness values in between. This helps understand that there are multiple parts of the image represented by a Zone. For instance, the garage door and the sky are in the same Zone VII. It is important to remember this when metering a scene to find the interesting highlight or shadows to meter but also to be cognizant of the other parts of the image. This is why you often see photographer spot meter lots of various parts of a scene so they build a mental map of where the tones are.
To understand this concept further I made a set of exposures with the spot meter set to Zone V to Zone X. This is all based on the meter reading for the garage door. You can see the progression.
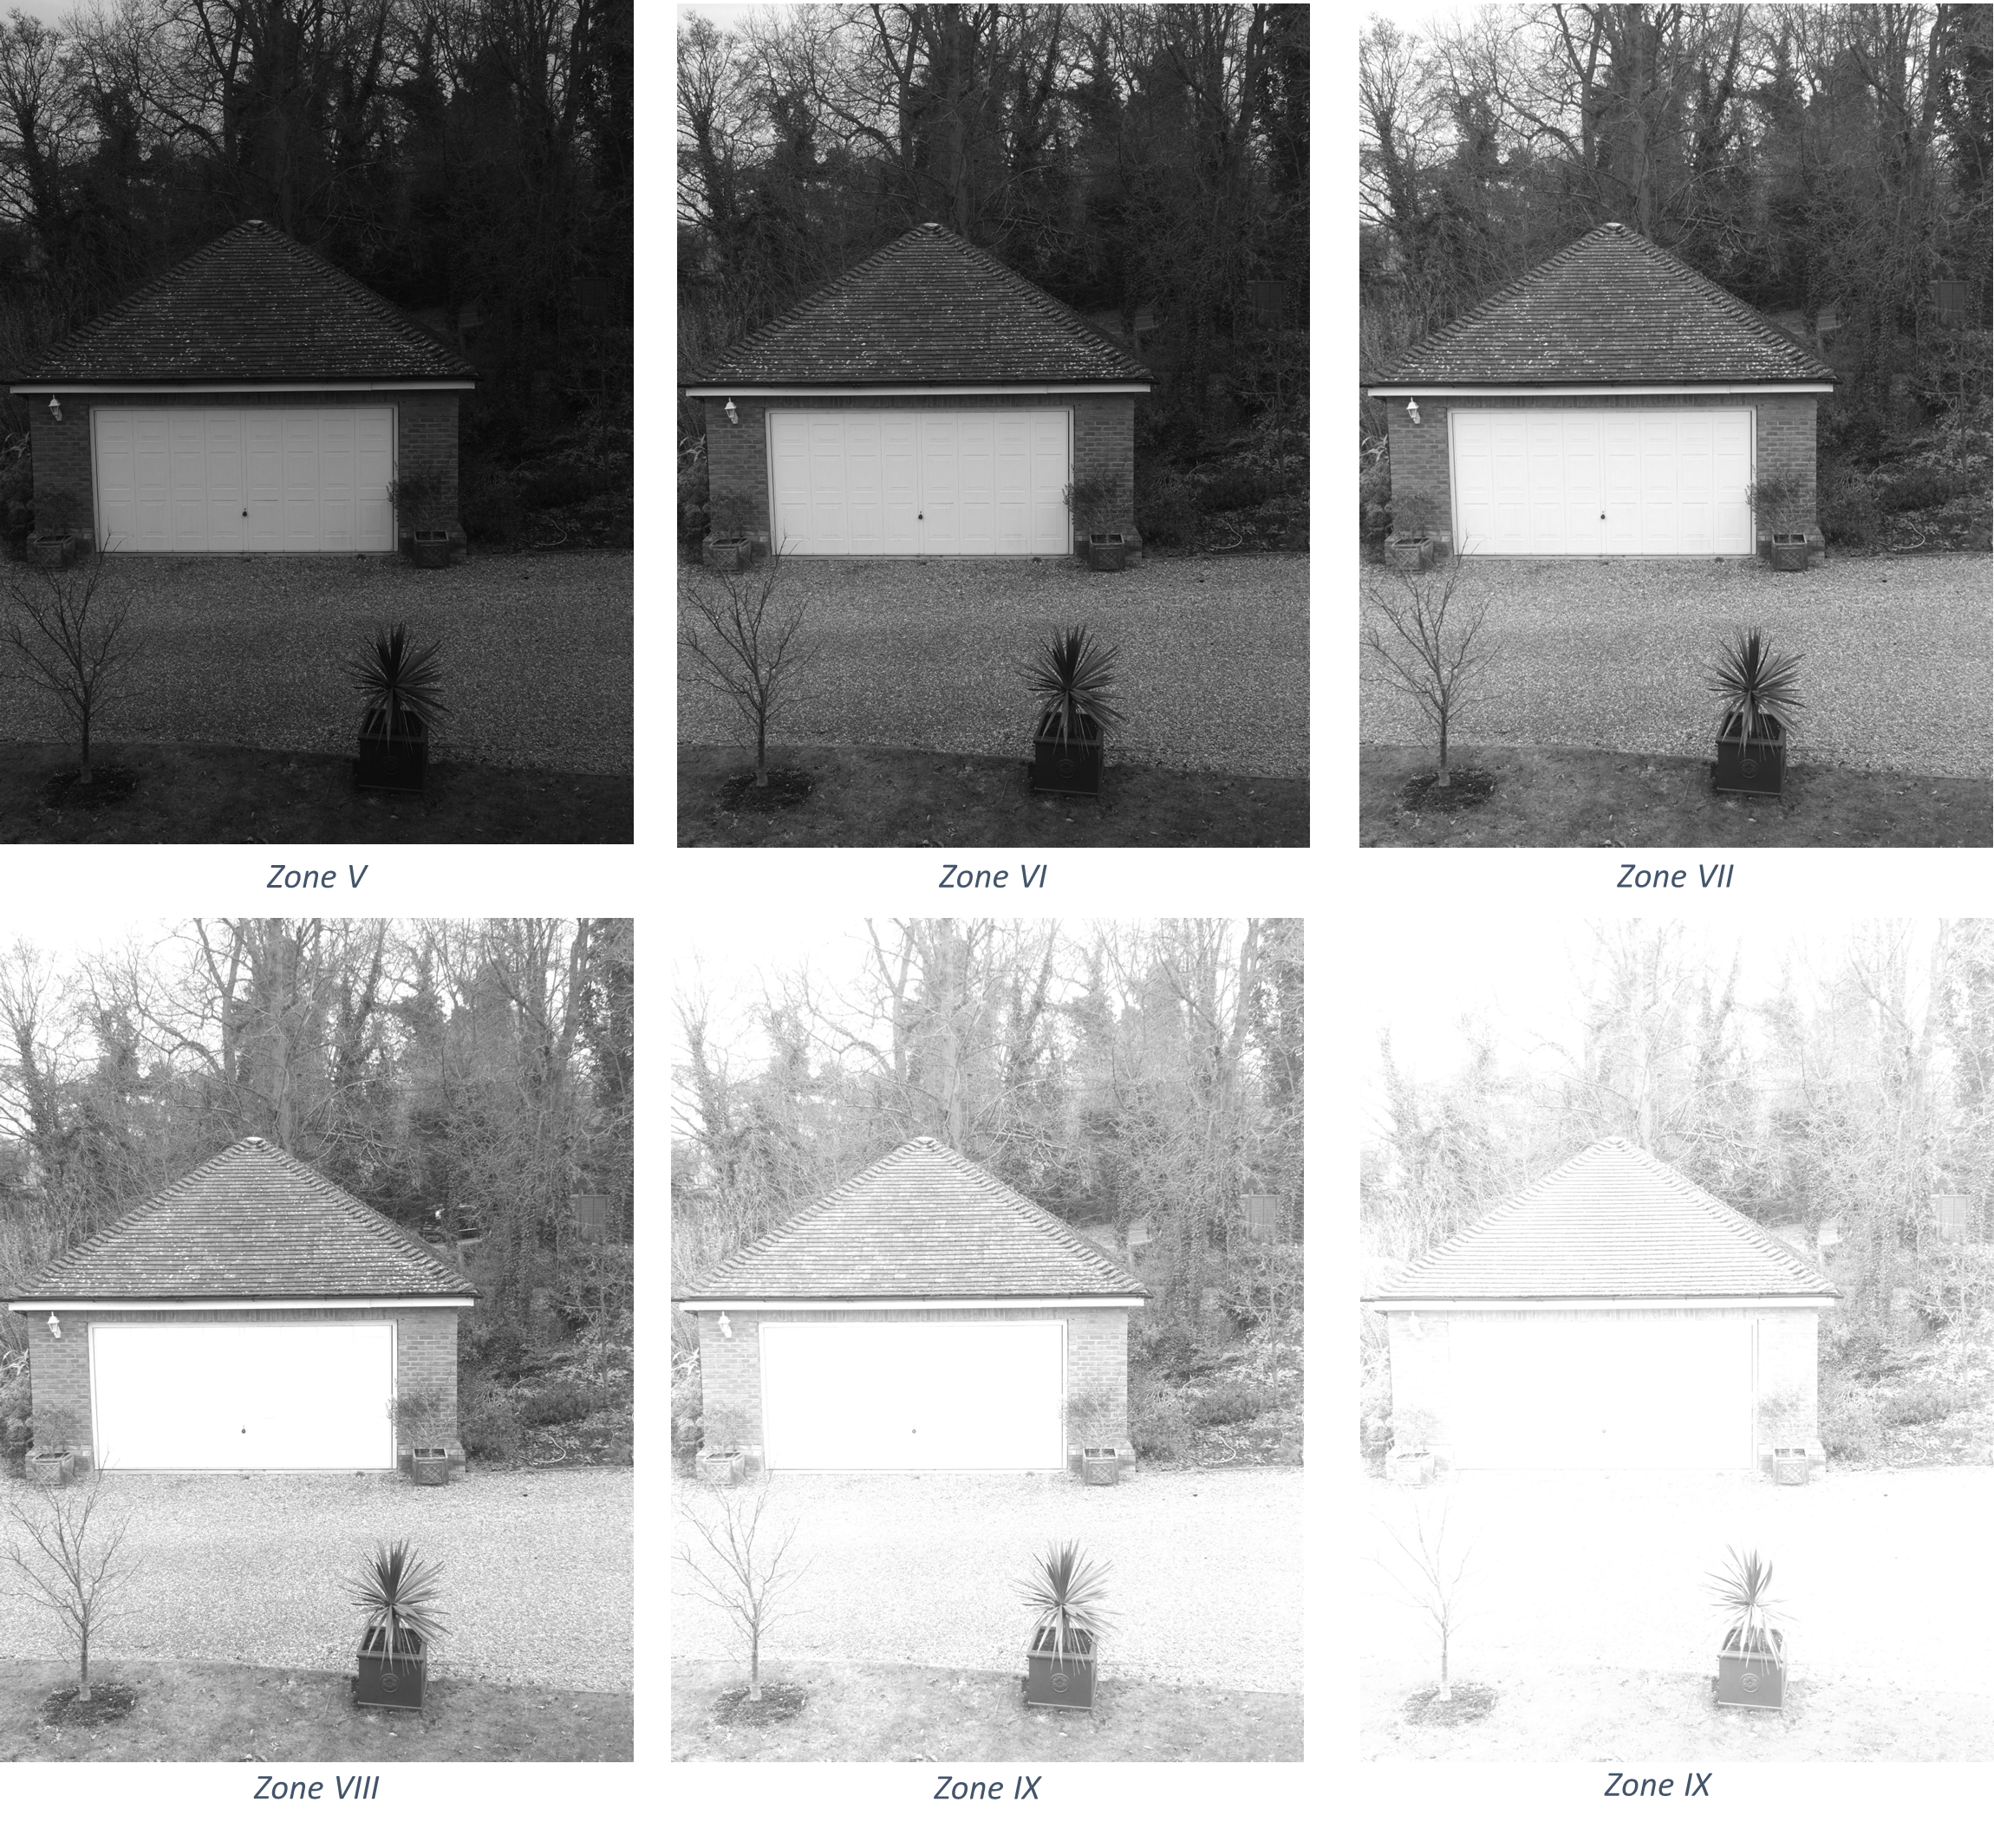
In fact, once you move past zone VII on the door the detail of the panels is lost. This is because the sensor lacks the full range that black and white film might offer. This is typical of different films and sensors. This camera is about 12 years old and represents the technology of that era.
This means I must ‘re-write’ the zone table for this sensor as we have to do with other films as well. For instance, I know from experiments that the zones would look as follows for this sensor…
Zone VIII, IX, and X Pure white (no tone or texture)
Zone VII +2/3 White with tone no texture
Zone VII White with tone and texture
Zone VI Light Gray
Zone V 18% Gray
Zone IV Dark Foliage/Lots of detail
Zone III Shadow Detail Still Held
Zone II Slight Texture
Zone I Tonality still some texture
Zone 0 Some Tonality
Zone -I Pure Black
Basically, the sensor does not perform well in the highlights and does better in the shadows. In reality it could universally benefit from being underexposed by 1 stop as indicated by the lack of texture in Zone VIII and the fact that Zone 0 still exhibits tonality. This is related to the physics of digital sensors and how the camera maker thinks the camera will be easiest to use. Like slide film you want to avoid overexposure if you want to retain tone or texture in the highlights.
Summary
What have we learned so far?
1. Average metering gives decent results for average exposure conditions.
2. Average metering doesn’t know what you want from the scene or what is in it.
3. You need to control the exposure process to get better results or to get what you expect.
4. Every film and sensor has specific exposure characteristics that you need to adapt to get the best results possible.
Click below for next section…
 Doug Morse