My Traveling Photography and Workflow
My Travel Photography Style
I don’t write often about my photography but some thoughts have accumulated and spurred by a discussion with friends about my current approach, here it goes.
I am not sure I have a fixed style as my work and interest evolves over time. I am firmly in the landscape genre and work mostly, though not exclusively in intimate landscape. A mind attended to the small bits and pieces that make up a landscape.
I was discussing my approach with some friends and how a long lens has impacted my style. They were curious and asked good questions which forced me to think more deeply about this style. Bob was kind enough to say he felt energized by my approach and wanted to take up the camera again.
When I travel I really try and imbibe the feel of a wild place. I bought a 500mm lens for landscape work. A lens normally promoted as one for wildlife or sport photography. To be fair the lens has led me slightly in the wildlife direction. Still I primarily use it for my landscape work.
A deeper dive on the use of long lens for landscape work.
Right now, it feels welded to my Fuji GFX 100s ii as it has for most of the last year I have owned it. The GF 35-70mm f4.5-5.6 sits on my older GFX 50s ii camera. This has led me into a style that is close to being documentary in style.
On a backpacking trip last summer weight became the disciplining factor, and I carried my dad's old Olympus mount Tamron 70-210mm f4 lens. Reasonably wide and somewhat telephoto. It was a compromise in service of reduced weight. Manual focus on the GFX is pretty simple and IBIS keeps the image sharp. See below my post from that trip.
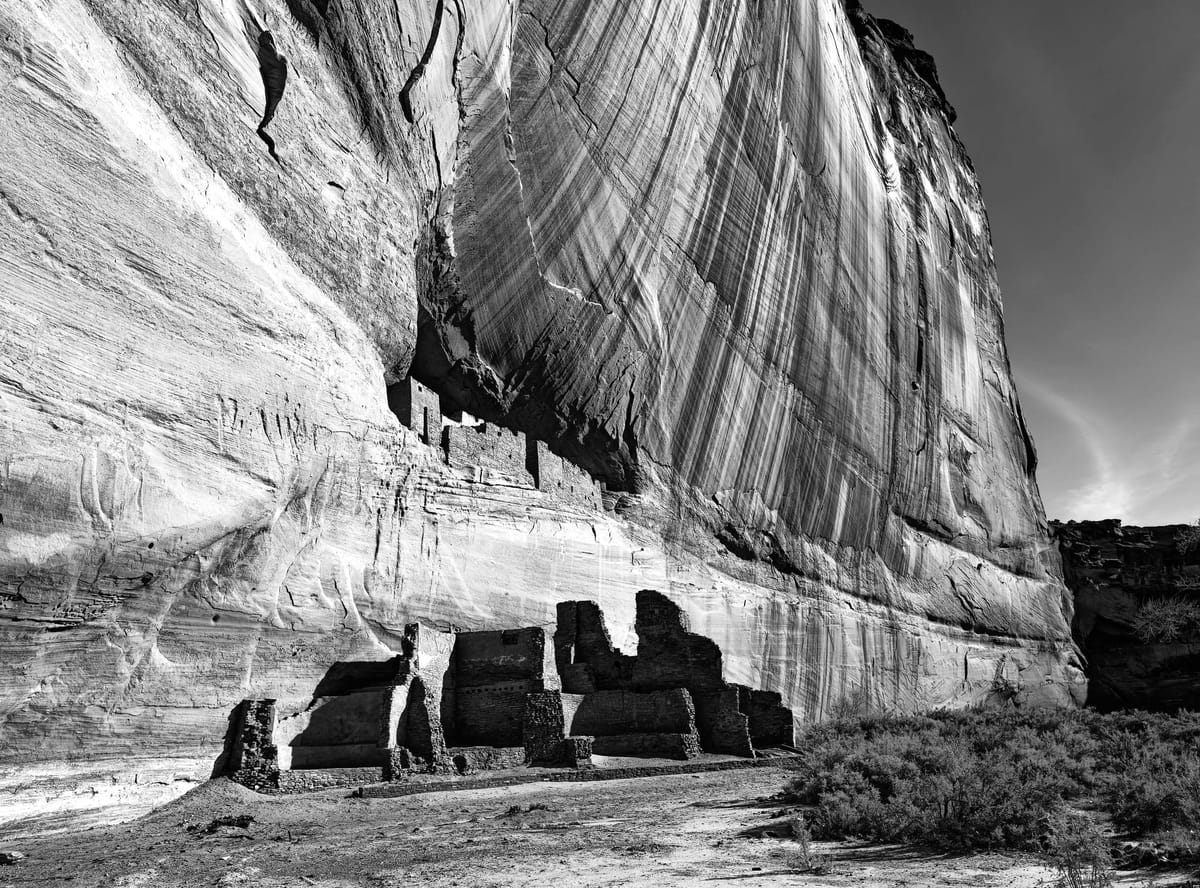
When I travel, I try and capture the mood of a place and I will use a wide angle to capture a context and the long lens to pick out items in the landscape. I do this because this has always been how I see the world.
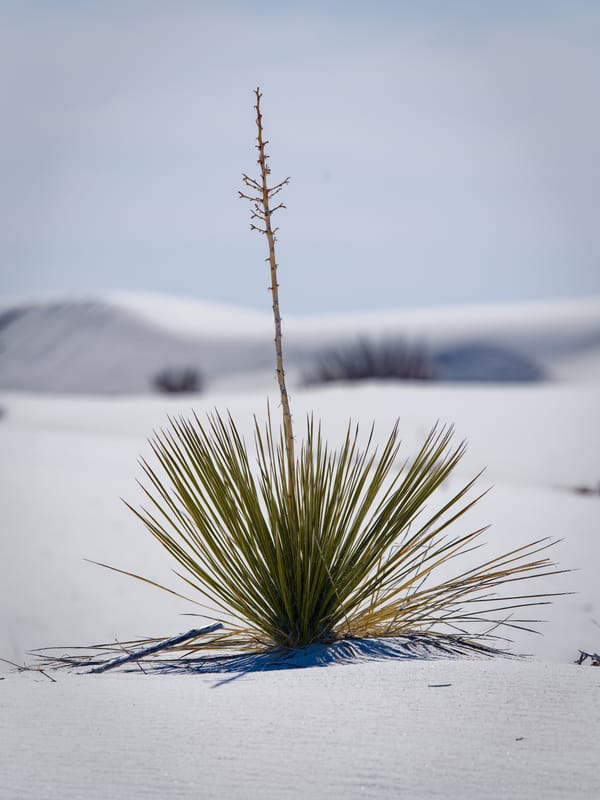
As I wander over the landscape my eye travels to small features, a tree perhaps, a cliff, the light glances off of water, a yucca, the texture of tree bark. From this I hope to assemble the best understanding of the place at least that day or season. This makes for a greater awareness of the broader scene be it mountains or close woods. These tend to be the subject of most photos.
A version of this style.
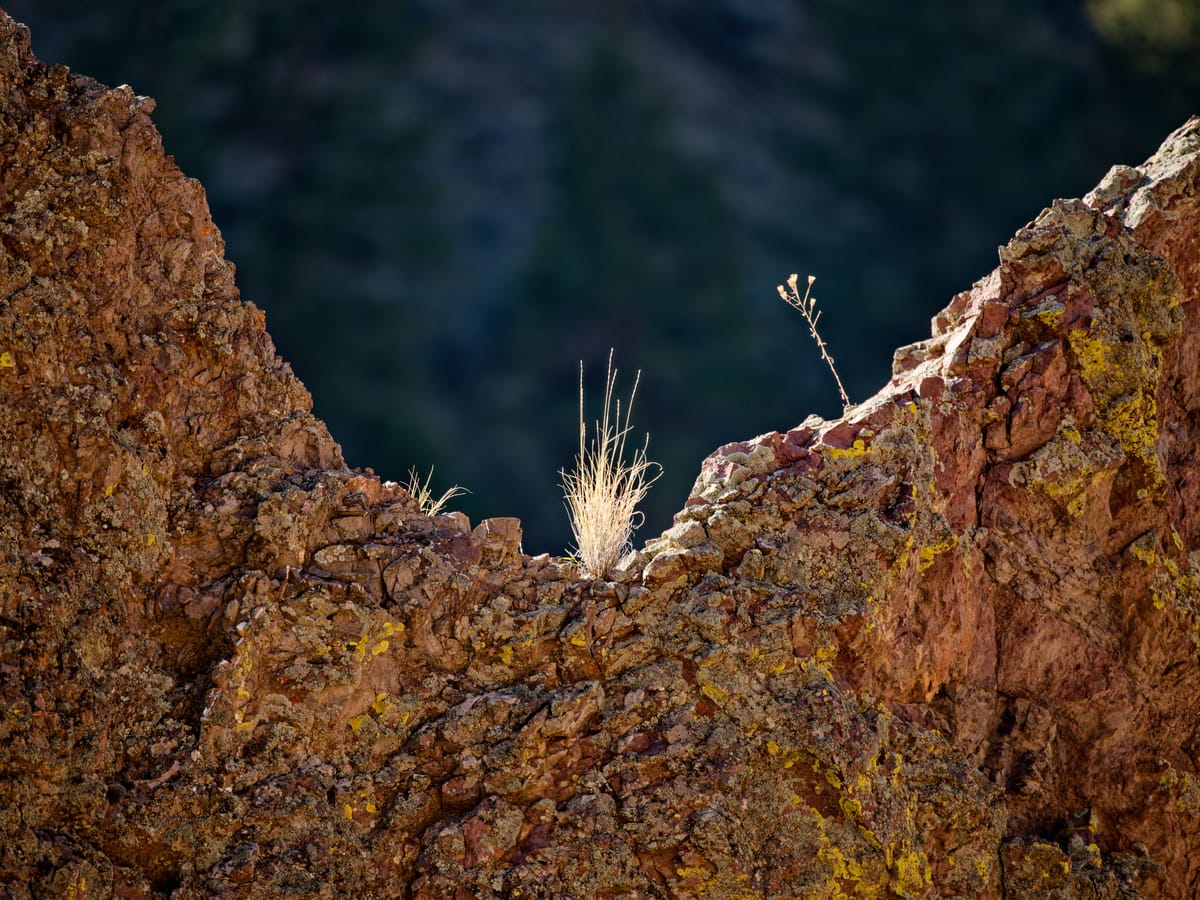
Adding in little vignettes, small details of tightly cropped portions of the broader scene bring interest and mimic the way we observe a landscape. This is why often times a wider angle lens fails to impress. We see in our mind differently than the optics render in pixels.
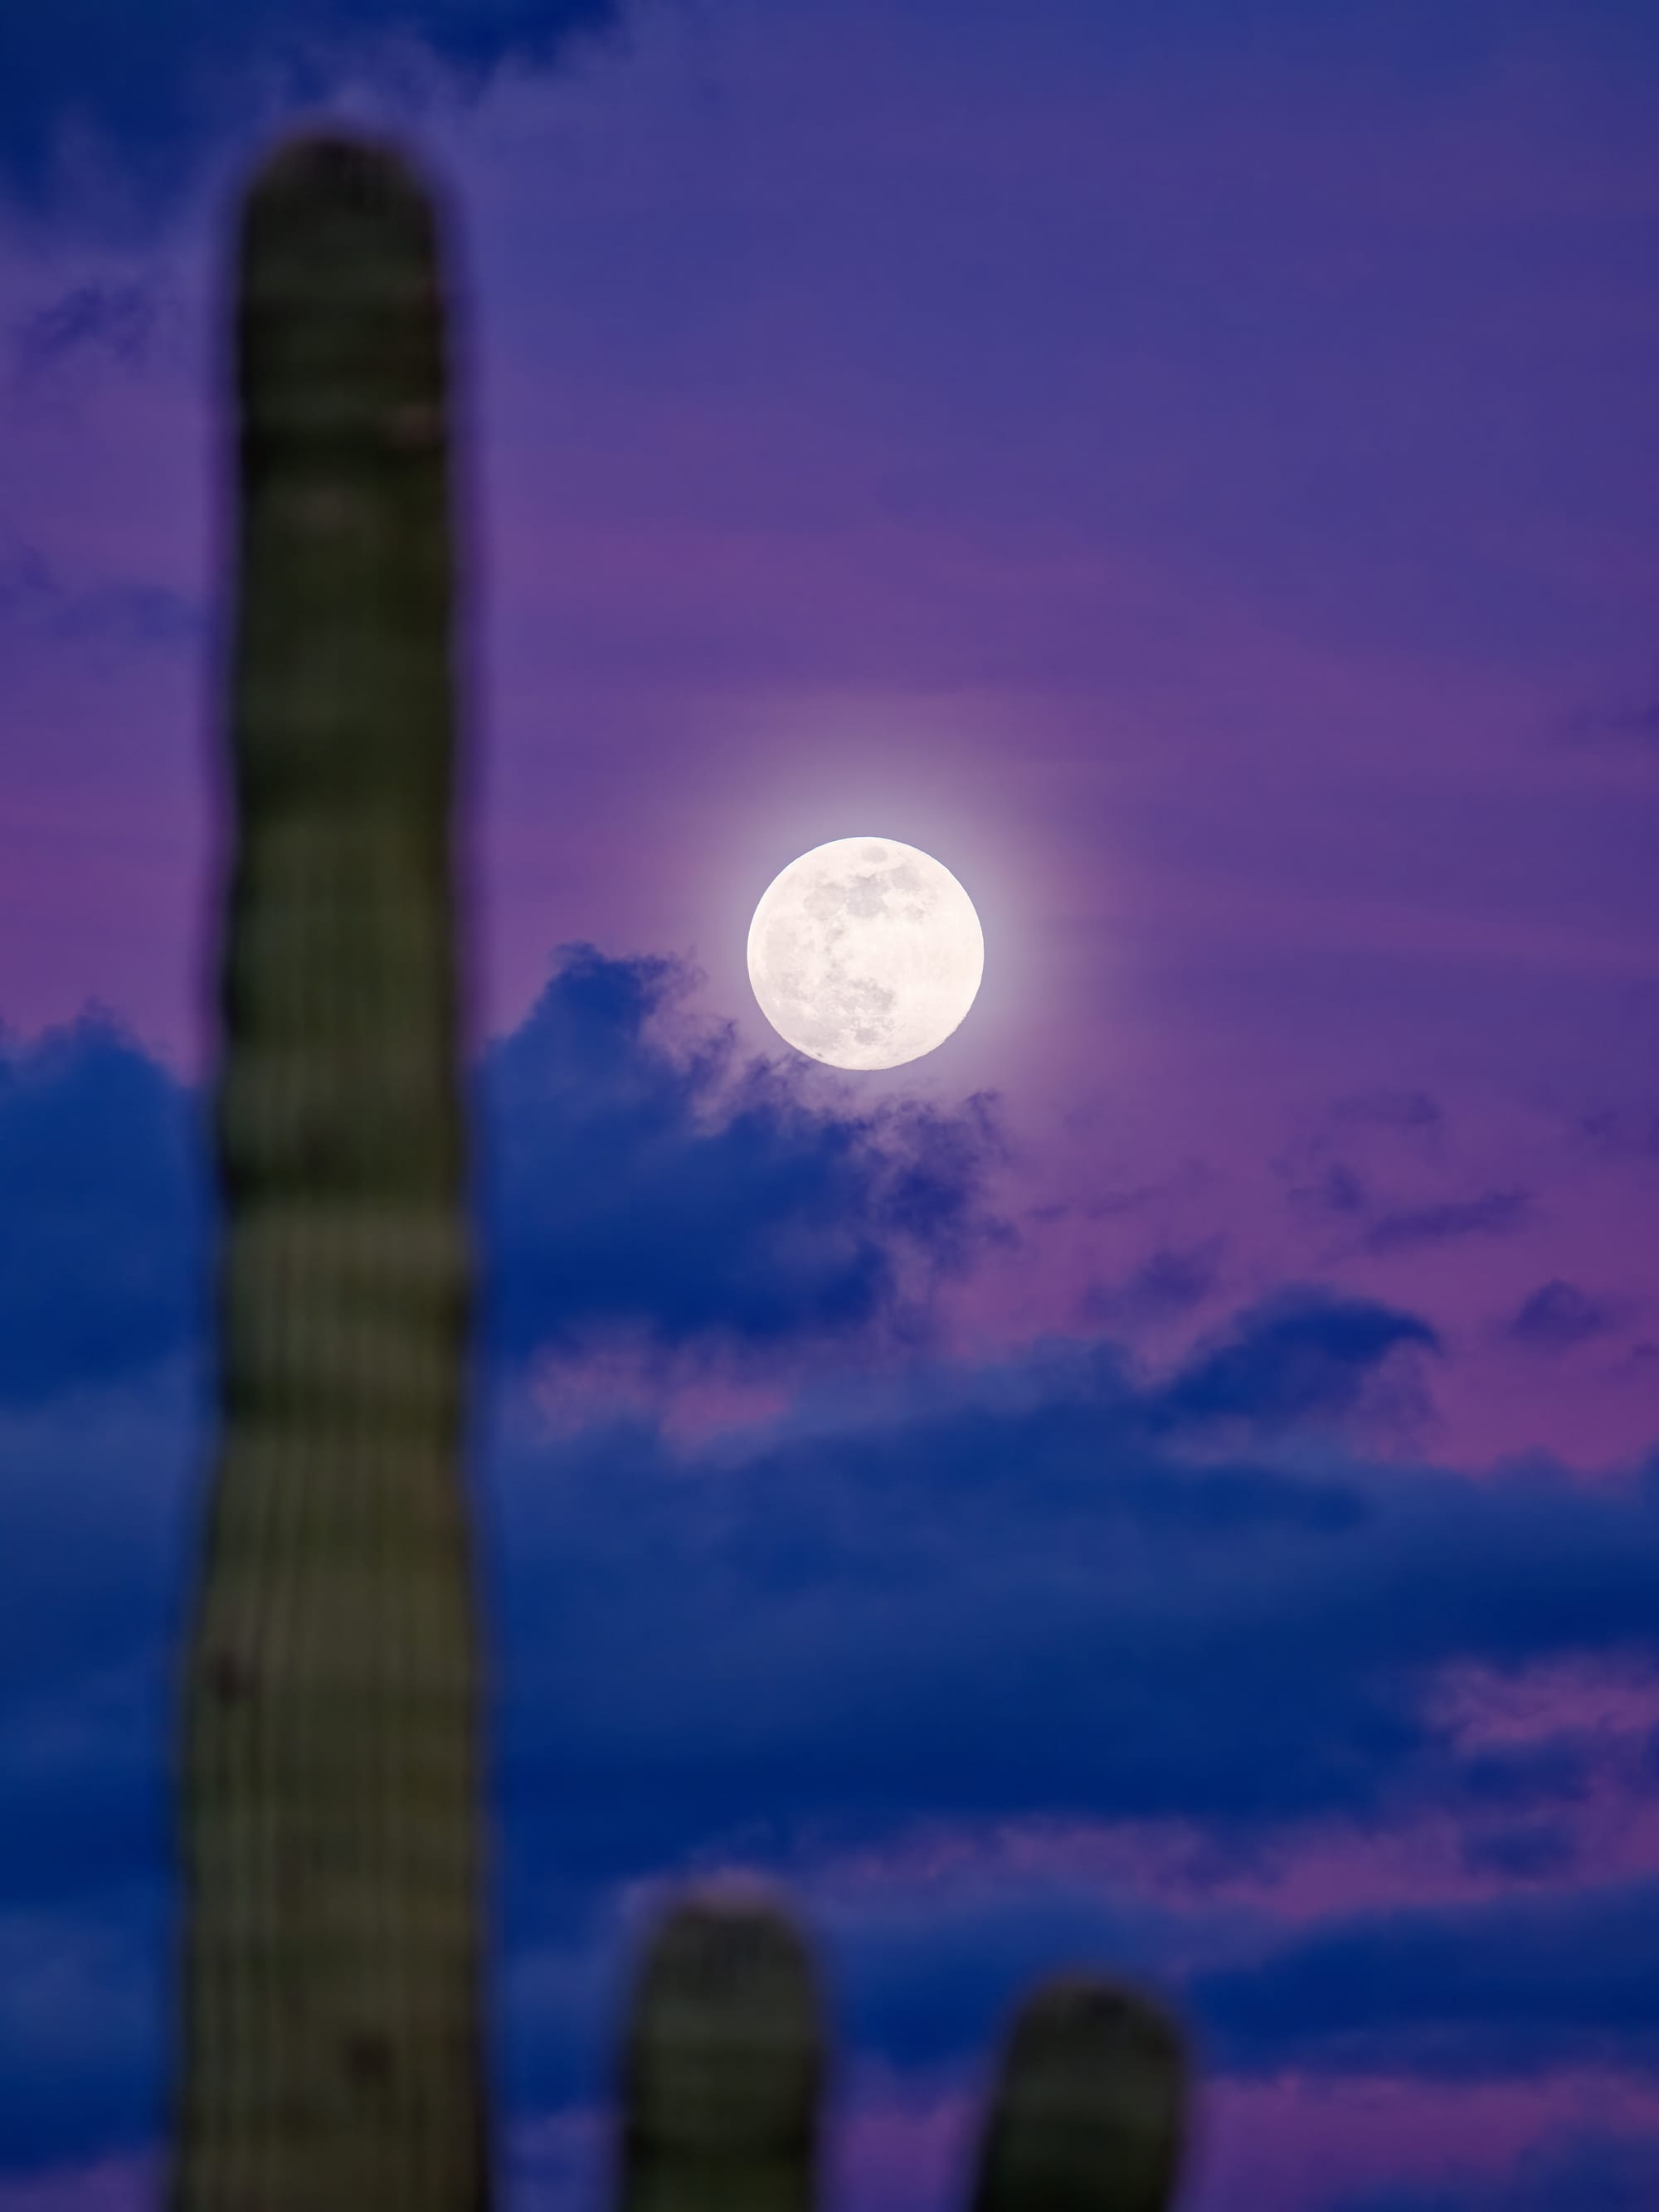
Take a picture of the moon with a 50mm lens on a full frame 35mm camera, which is meant to be close to how the eye sees the world, and you will be shocked at how small the moon actually appears. The subject is larger in our minds because that is where our attention is. So, I bring out a longer lens to examine where my attention is and bring it closer. In a way I scale the image to the level of attention.

The documentary aspect comes when I travel and blog. I want to assemble in words and images of what a place was like.
This means I rarely use a tripod when I travel. For me a tripod is great for set-piece landscape work. Where a place has been scouted, the time of the right light chosen and the image composed and fussed over. Small ISOs and longer exposures when needed. Time is taken for the sharpest image possible. Tripods are best when shooting alone or with a patient dog.
The setup and fuss will try other’s patience who just want to enjoy the time out and may well frustrate your own enjoyment. I used to shoot a lot of 4x5 film and that is amongst the fussiest work available in a camera. I found it wonderfully calming but I would never subject another person to watching me take twenty minutes for a single image.
My approach when I travel is much closer to street photography. Where the street is the mountains, woods, canyons, or deserts. I almost always shoot handheld. This means I can always be tuned to impressions and images and not have to worry about who I may be out with. I can work quickly and keep my attention livelier as well.
Technical Thoughts on Making this Style Work
I shoot almost exclusively with auto-ISO when shooting handheld. I typically shoot auto-3200; that lets the camera select the ISO depending on the light. I also use aperture priority most of the time and manually set the aperture. The camera then optimizes shutter speed and ISO. It does a pretty good job. I want to control the aperture either to optimize light or to control depth of field.
For my 500mm lens the camera tries to force a 1/400 second shutter speed if there is sufficient light. This means there is almost no possibility of camera motion blur. If the ISO is topped out it reduces the shutter speed and that is when image stabilization comes in.
If I care about ISO noise and the light is sufficient, I might switch to auto-ISO 800. I have recently started using DxO image processing software and it does a remarkable job of cleaning up ISO noise from RAW images when it matters. As a result, I tend to not worry about ISO noise very much. The point is the image. I also have either 50 or 100 Mpixels to work with so noise is often very small.
Thoughts on Image Sharpness:
Images become soft or unsharp for a few reasons. 1) Focus, 2) Lens sharpness, 3) ISO, 4) Camera and subject motion
Focus is mostly up to you and the camera. The lenses mentioned here are autofocus but that doesn’t always mean the subject is in focus. It is always good to check the focus of an image before moving on. (Manual lenses have the benefit of focusing on what you want them to.)
The lens sharpness is dictated by the quality of the lens and where the optimal focus is when stopped down. Most modern lenses are ridiculously sharp so now the question is around what f-stop to shoot to get optimal sharpness.
This however interacts with shutter speed and ISO selection to get a good exposure. When shooting birds I always shoot my 500mm at f5.6 as this lens is very sharp even wide open and I want as much light as possible to get good fast shutter speeds. I have an Olympus manual lens that is 135mm that at f2.8 that is crazy sharp as well. On other lenses I stop down a couple of stops if light permits. (I will not be discussing depth of field here.)
ISO is the great improvement in digital photography compared to film. Changing ISO means you can still capture an image even if the light is otherwise too low. It also allows you to use a higher shutter speed if needed.
Higher ISO is not magic. There is only so much light in the scene and the camera cannot manufacture more. All that happens is the sensor amplifies the light signal and like a stereo which has its volume turned up in a quiet interlude, the noise begins to be apparent and this manifests in images as softness and a speckled effect in areas of even tone. As mentioned above there are tools to help remove that softness and noise.
Camera motion is due to an unsteady hand and too slow a shutter speed. For unstabilized lenses the rule of thumb was to set the shutter speed close to the reciprocal of the lens focal length in mm. So my 500mm lens I should shoot at about 1/500 second. Image stabilization allows the shutter speed to be slowed as much as five or six stops. The 1/500 shutter speed for the 500mm lens mentioned above could be as low as 1/15th of a second. But you must be very still with the camera to achieve this. I can usually shoot 1/80 with the above lens however.
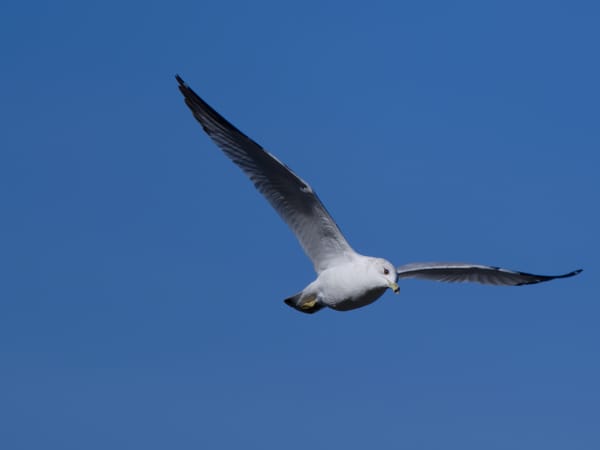
Subject motion such as running water or wildlife is aided exclusively by shutter speed. Image stabilization does not help. That is why I try and shoot moving birds at 1/2000 of a second. The lens is left wide open and the ISO floats to where it needs to be. If everything is working I can get pretty sharp images of birds in flight. It is not easy and I am still improving. (My camera is not the best for bird photography. If that is your thing I recommend a crop sensor camera, like APSC, Fuji XT or Micro 4/3)
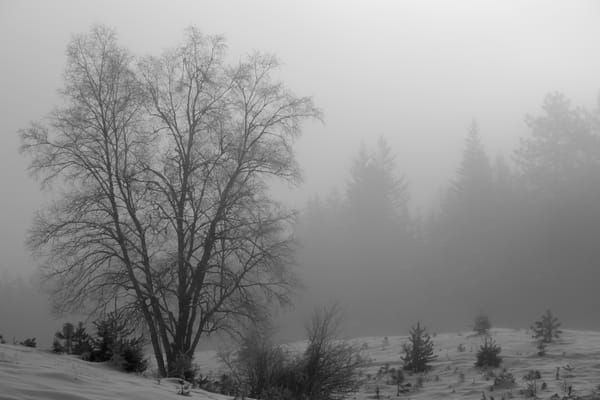
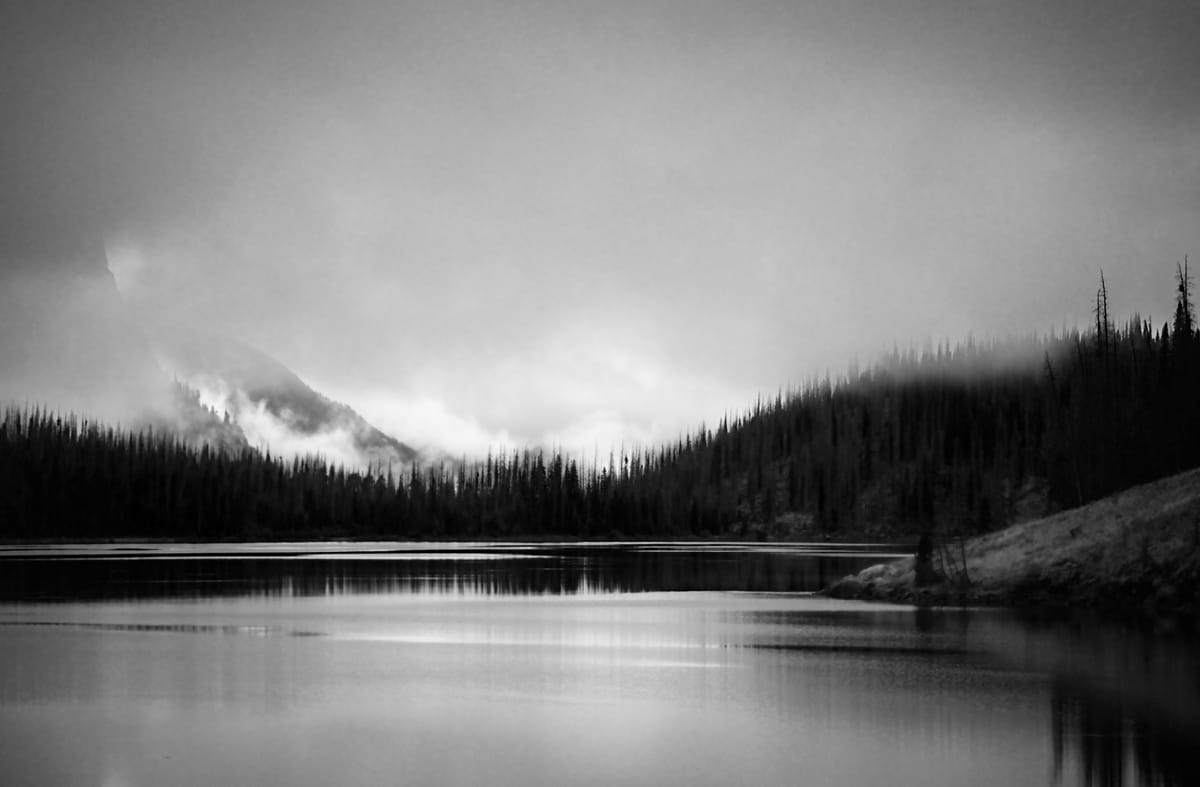
Sometimes a soft image is better. I learned this when I lived in Britain. There the air is damp and heavy, often misty or foggy. The scenes lend themselves to softness and so one may actually open-up the aperture or change ISO to get a softer image.
Post Processing on the Road
When I travel, I use an iPad for my blog editing. It is small and light and easier to use than a laptop. I use a Bluetooth keyboard for writing.
I actually use the built in Apple photo editor to post-process my images. I am mostly editing JPEGs though I also save RAW versions in case something really exceptional catches my eye. I use the Fujifilm Provia film simulation most of the time. It gives reasonable contrast and some decent saturation without some of the silliness that Velvia can create. Classic Chrome works well I find in desert climates where the softer colors can be preserved better. Everyone needs to discover what they think works best for them.
My basic flow with the Apple editor is to start with the magic wand tool. It tends to get the image into a good brightness range. Next I turn off saturation and the related control vibrance. Saturation is the most overused tool and it can quickly ruin an image.
White balance on a camera is tricky and while I have moved to Auto White Balance-A that preserves ambience I find on this camera the images tend to benefit from a slight increase in warmth, usually I aim for +20 on Apple Photo. You should try it as it gives some of the impact of saturation without going crazy. The camera leaves too blue a cast and this cleans it up subtly. The cautions are where there is pure white in an image like a cloud. It can make the whites look dirty so ease off in that case.
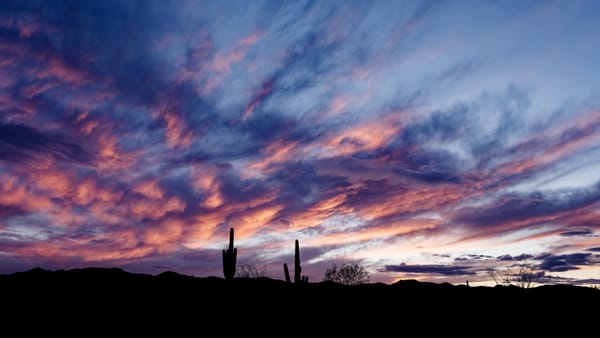
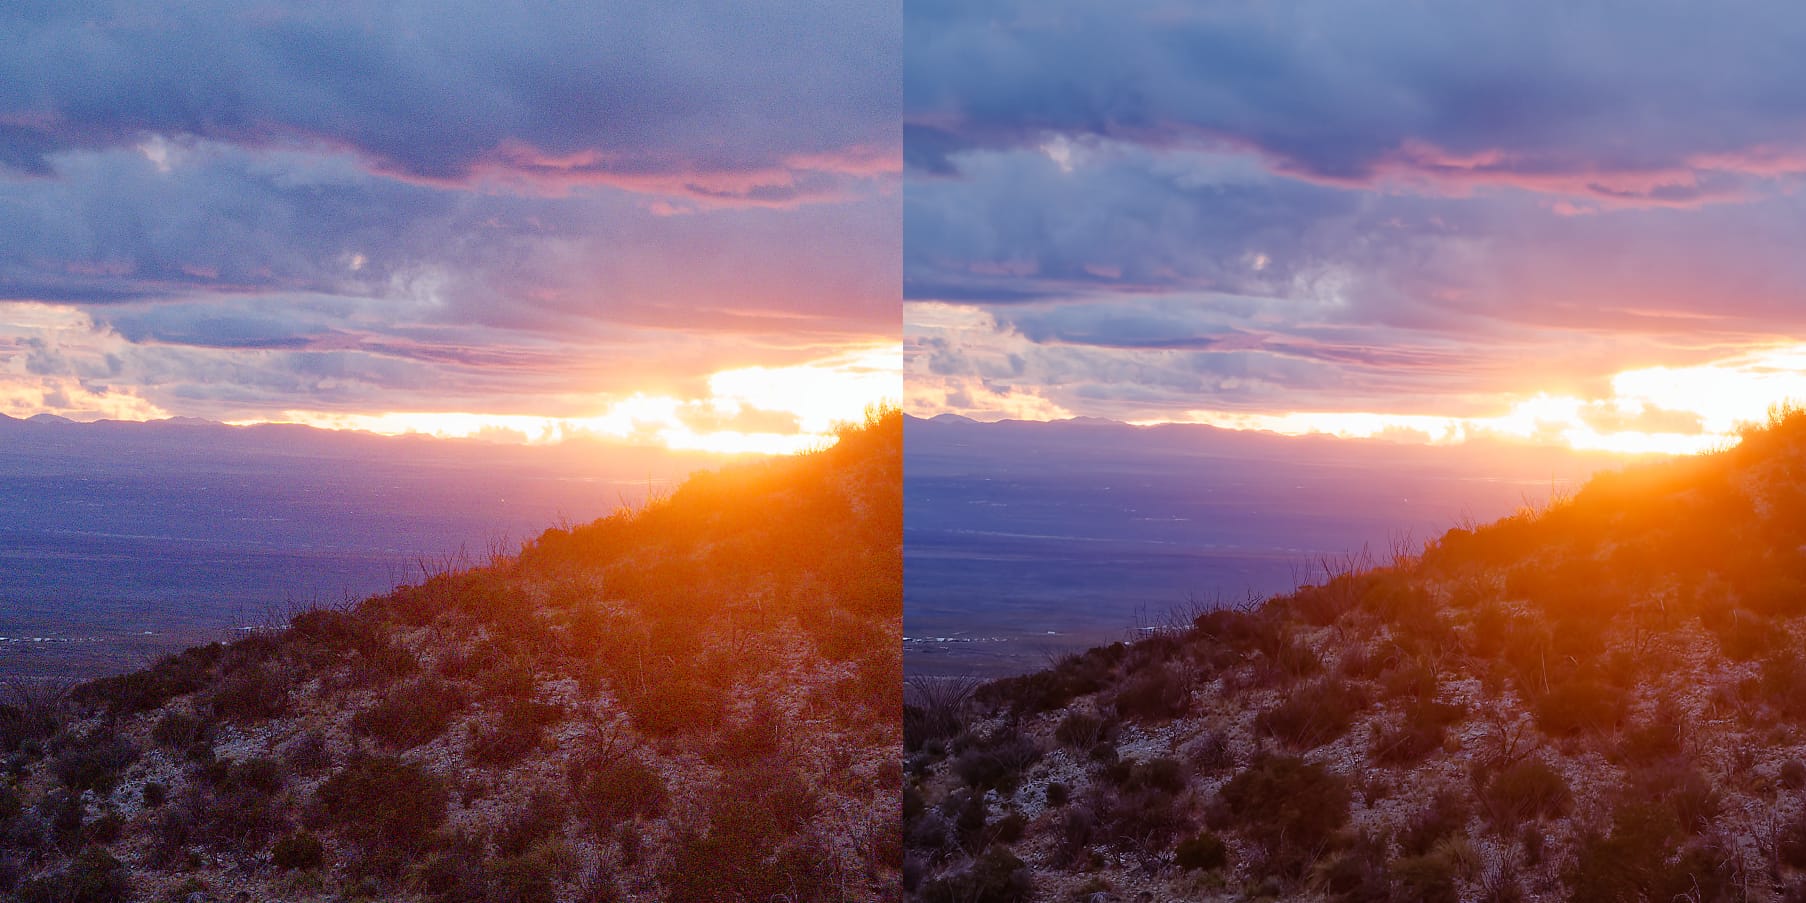
For sunrises and sunset I may boost to +35 as the scene is supposed to be warm. Sunrise and sunset light are also times when using saturation may make sense. Though again aim for natural. Even good photographers use too much as they know it excites the eye, but it quickly looks unnatural.
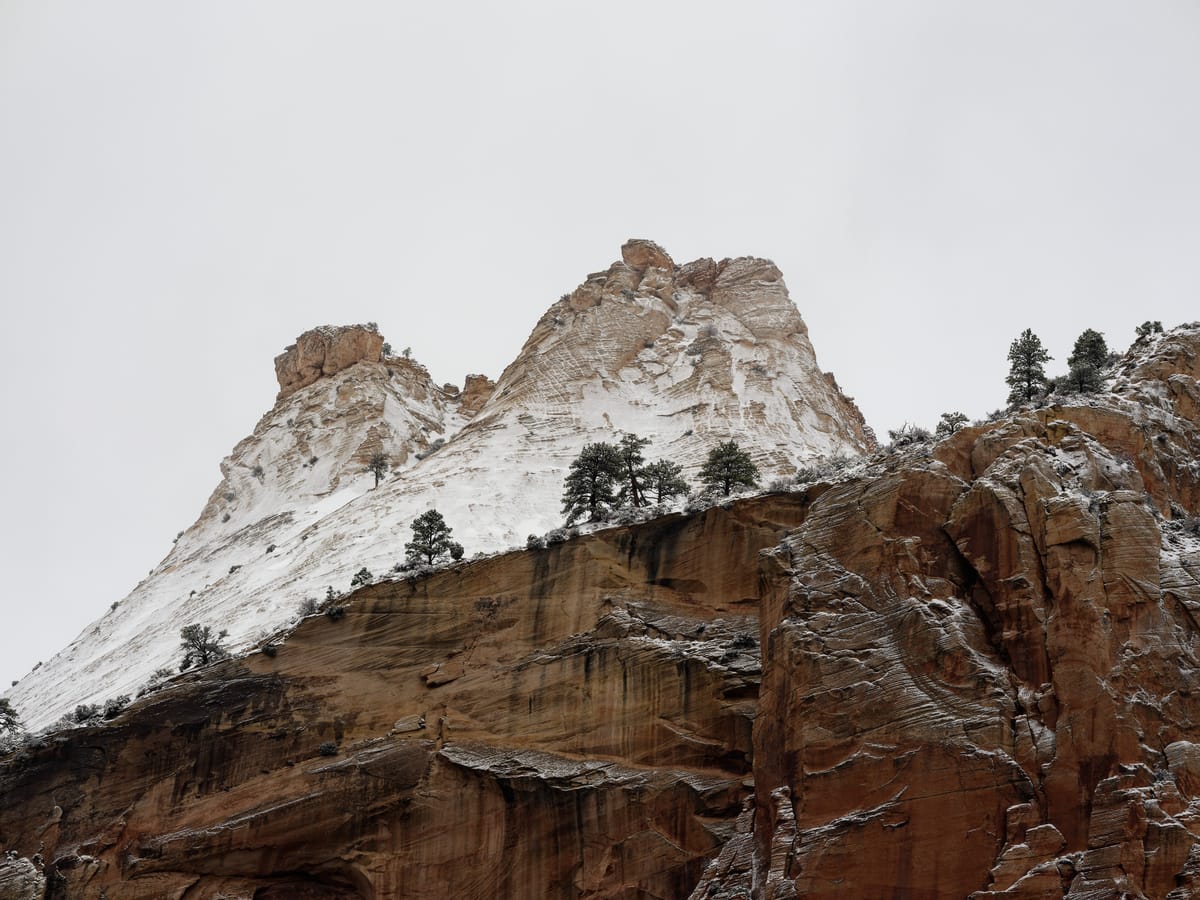
A quick demo of what I describe above.
Finally, all of this color work is best if you can apply it consistently. Same level of saturation (if any), same white balance/warmth added. In the movie business this is called color grading and the whole scene is treated consistently so everything looks the same through-out. If you are producing work that will be seen together such as for a zine or a blog I think it is best to strive to keep the color palette closely matched. This means the images flow from one to the other throughout the same subject piece. This is different from a single excellent photo you might present or print.
Next, I play with contrast, shadows and highlights. Contrast is a great way to get some saturation effect without going too far. Vignette is useful for many images. Now you are into personal style and taste. The great thing about the Apple photo app is you can revert and start all over again. It is quick and simple which means I can edit at about the same rate as my Wifi can load the images from the camera.
When I get home I go through my best images and edit the RAW versions on DxO. Sometimes I pull out an unexpectedly nice version, better than the Apple-edited JPEG I did on the road.
Shrinking the Images for Publishing
Once I have the images whipped into shape the next step is to get their size under control. My GFX 100s ii produces 40-70 Mbyte JPEGs. This is too big for most blogs like Substack to host. I use a couple of shortcuts on the iPad. They are based on the default example called 'resize image'.
One I have setup to make the longest dimension 3840 pixels (4K) (the camera produces over 11,000 pixels on the long axis). This and the recompression to JPEG brings it down to a few Mbytes. I also use another that shrinks it to 2048 (FHD) on the long axis. This gives a few hundred kilobytes of file size.
Most monitors are FHD so even the highest compression will look good full screen. The 4K compression allows for someone to zoom in a little.
If I am traveling without Wi-Fi the higher compression can make the difference between uploading a post and not.
I will select about 6 images at a time and run them through the shortcut. I the hit delete for the still-selected originals (they are still on my camera). This saves an enormous amount of space on my 128GB iPad memory.
Shortcuts to make smaller images to save space and upload times.
The final step on the iPad is then to organize each location into its own folder.
When it comes to backup I can copy each folder into the files and store the file folder onto an SSD. I want to keep these edited/smaller versions because they are the ones that show up in my blog and if I edit and add or delete photos later, I know the images will look consistent. I also make zines of my blog entries and again to keep the look the same I want the edited JPEGs I used in the blog.
Finally I carry a couple of 1TB SSDs. One backs up my camera and the other my iPad.