Film Types and the Zone System: Slide Film
Chapter 5
We know that historically that the Zone System was created to describe exposure of black and white film. Properly exposed and developed black and white film has a very wide latitude. Other film types have different exposure ranges.
In this section, consistent with the subject of the book, I will not be discussing attributes of these film types such as color palette, grain and other aesthetic aspects that might influence a particular film choice. The best source for this insight is Alex Burke’s ebook Film in a Digital Age. It is well worth the price and was one important source for improving my own film work.
Slide Film
Let us take for instance the most challenging film type: color slide film. Also called reversal film, E-6 (for the processing chemistry) or chrome (due to trade names of Kodachrome, Ektachrome, and Fujichrome) these films as the name suggests were created to make slide shows or projected images (the technology is the basis for movie film as well). Hence, they are positive images which is why they are called reversal film.
Slide films can produce some spectacular images and for a long time were the gold standard for publishing and landscape photography. They are also a thing to behold, especially in larger formats as they are complete positive images with rich colors when properly exposed.
Fundamental to the development process is that the film has a very narrow exposure range. Slide film is notoriously susceptible to overexposure but also underexposure. In fact, it has only about five stops of useful range. If we put this on the zone scale, we have been using we can see what that looks like. Where anything above zone VII is blown out pure white and below zone III is pure black.

The rule of thumb is to meter the highlights and place them in zone VII. This is because slide film that is overexposed at all does not create good results. Here are some examples. All taken on Fuji Velvia slide film except where noted.

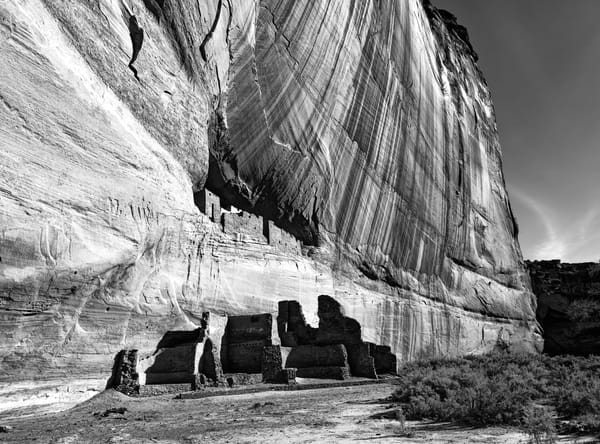
The first one above shows how disastrous overexposure is. I took this before I had a spot meter and relied on average metering. It shows the lively saturated colors that Velvia is famous for, but the bright sky is blown out and ruins the effect.
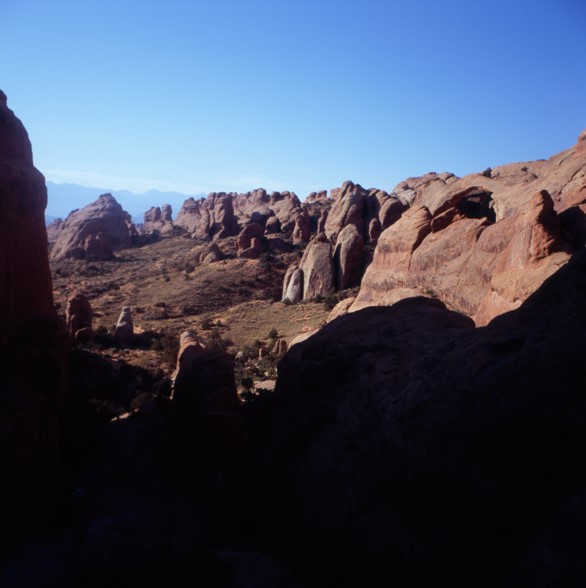
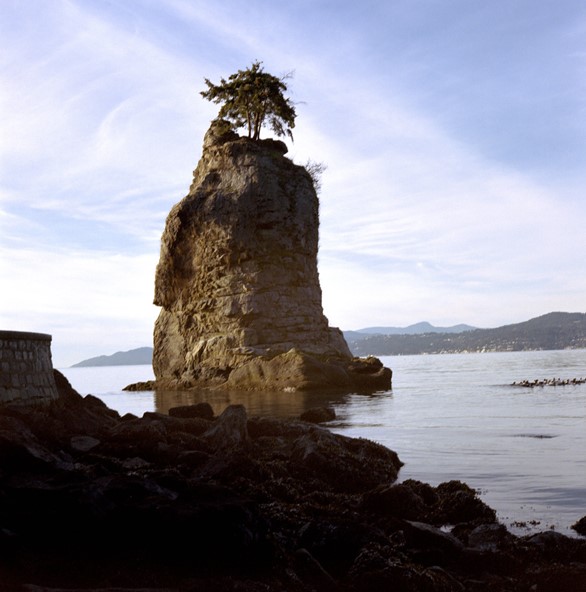
The photo above shows the problems with shadows. A bright summer day in the American Southwest, the sky and sunlit rocks are properly exposed however the shadows are completely black and lack detail.
There are different strategies for dealing with this; one of which is not to use slide film in certain situations. In the American Southwest photo above, it makes no sense shooting that kind of film under those conditions. Disappointment will be your companion. Bright sun in the middle of the day creates deep shadows. These are conditions better suited to color negative film. The first lesson is don’t shoot slide film in conditions it is unsuitable for.
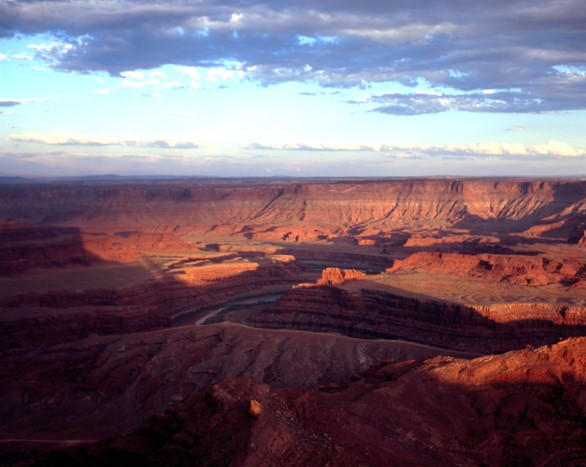
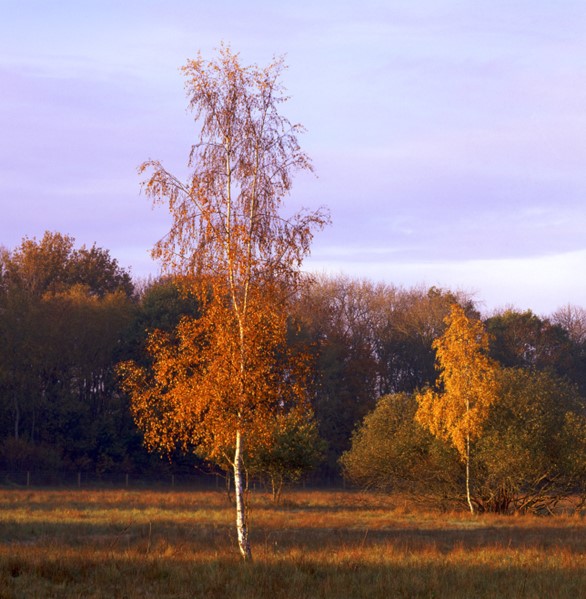
For instance, I shot the same film on that same holiday but around sunset where the range of light intensity was much less and Velvia performed well. The highlights and shadows are all intact and the photo has more drama and interest as a result.
The next strategy is subject to artistic intent. There are no hard and fast rules, but it is usually visually preferable to make sure the highlights are properly exposed. Most would agree that the overexposed example above is very distracting. Yet sometimes we cannot fit the full range of light in the five stops slide film gives us. In general, the preference is to lose the shadows as in most cases this is the more appealing choice.
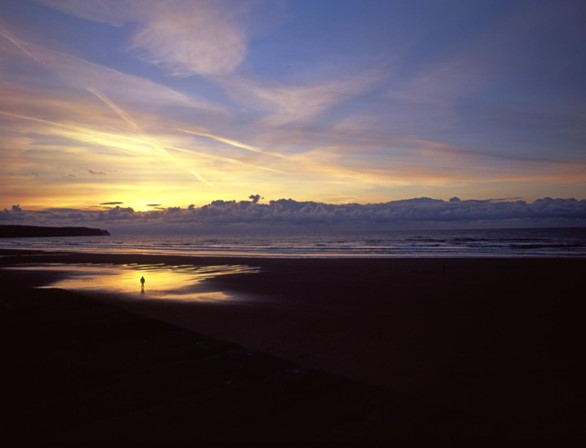
The photo above was taken at sunset in Whitby in the UK. The sky was quite bright, so the image is exposed to hold those highlights. What we get as a result is the texture and detail as well as the rich golden color. What we lose is any features or texture of the sand on the beach. But clearly we don’t feel we are missing anything in the image because of this.
If the highlights had been sacrificed, they would have appeared white and without interest. This was an artistic choice. If both the highlights and the shadows are important then perhaps we are using the wrong film. In these cases, I always meter the highlights and ‘place’ this Ev in Zone VII to determine the exposure. I let the shadows fall where they will knowing that they may be completely black. You can of course meter the shadows to see where they will fall. This may mitigate a choice not to take the photograph (always a good option) or change to a different film type if your camera gives you that option.
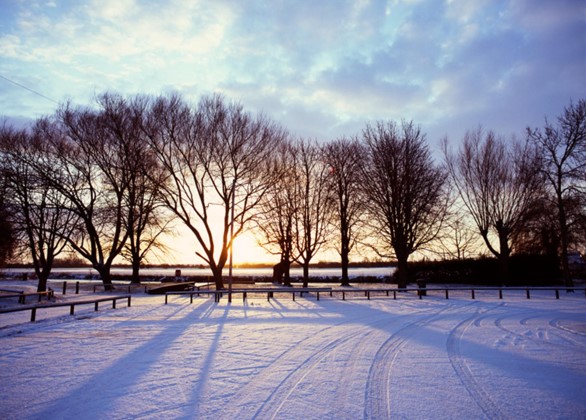
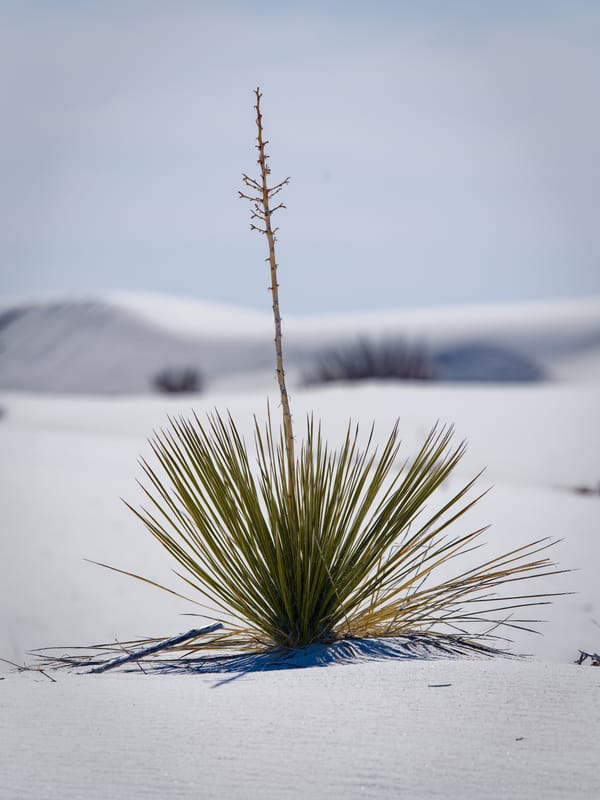
That being said, there may well be cases where you want to blow out the highlights and it won’t detract from the photo. The example here is low sun streaming through trees casting shadows in the snow. The conditions are well outside the range of slide film (in this case Fuji Astia) the trees are blocked up, so we are below Zone III there and the area around the sun has no detail (but still retains color) so above Zone VII. The image works because we don’t miss the detail in the tree trunks the silhouettes are enough, and we don’t feel like anything is missing around the sun. This is a case where average metering works and setting the exposure halfway between the shadows and the highlights. I never spot meter the sun as this will always be blown out, instead I pick an area of sky close by for highlights.
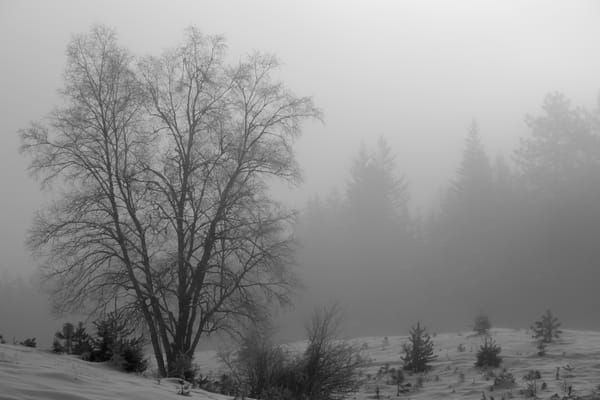
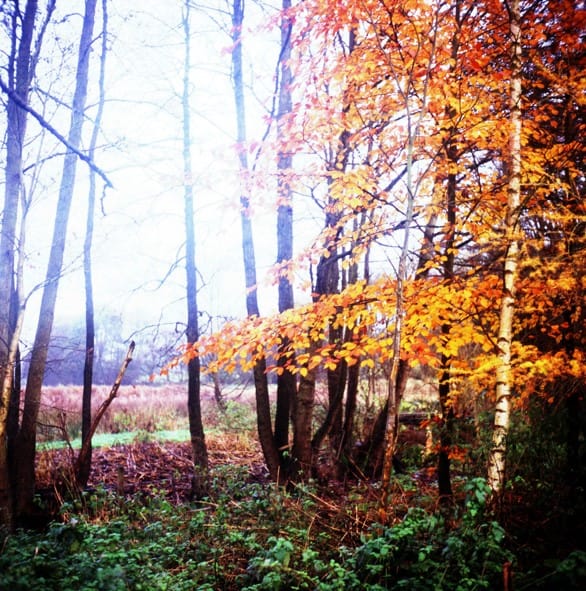
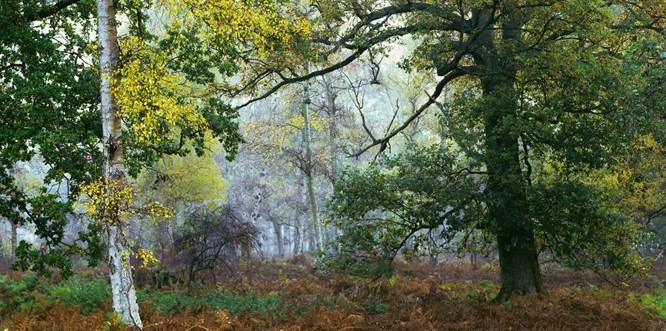
If you have the conditions suited to slide film then it all comes together. This photo was taken in a woodland early one foggy morning on Fuji Astia. I do not think any scene that morning had more than five stops between the brightest highlights and deepest shadows. Under the right conditions slide film is magical.
Graduated Neutral Density Filters
Another strategy is useful in some circumstances. A graduated neutral density (GND) filter is a filter that reduces light gradually, starting in the uppermost part of the filter. Because light reduction is gradual it is not noticeable. I use a 2-stop GND referred to as a .6 GND (.3 is one stop). This is the most useful one for landscape work. Because the filter extends across the image, they are only useful where the highlights are distributed that way like a horizon.
I tend to have the filter extend about 2/3 the way down the image but this is subject to taste and the specific composition. There are many tutorials about GNDs online and again Alex Burke’s book is great source of good instruction.
Because my GND filter cuts the light by two stops, I have a take this into account in the metering. If for instance I read an Ev of 10 in the sky highlights and I am using a 2-stop GND then I need to subtract those two stops before figuring my exposure. So, I would use an Ev of 8 and then look up the aperture and shutter speed.
Here is an example where the rising sun was brightening the sky and forcing me to compromise between capturing the color and texture of the sky and the detail and color in the shadows. A GND nicely solved the problem. The sky colors are saturated and good shadow detail is retained. The GND did cover the top of the foreground tree but this darkening is not too apparent, so I got away with it. This can be a problem in some cases.
(As a side note I find a GND can be good in some woodland settings even though the image lacks a traditional horizon line. Often time when a woodland image is being contemplated with the top of the canopy in view the light from the sky casts a much brighter direct light on the treetops as opposed to lower down where the light is dominated by reflected and hence less intense light. A GND can help restore some tonal balance from the top to the bottom of the image.)
I treat most slide film the same and place the highlights in Zone VII. This includes Fuji Velvia 100 and 50, Provia 100F, Astia 100 (discontinued), and Kodak Ektachrome 100. I shoot them all at box speed except for Velvia 50 which I shoot at ISO 40 as it seems to prefer a little more exposure; there seems to be a consensus about this with photographers.
If my camera supports it then I try not ignore 1/3 stop increments in exposure settings, as I think trying to get that extra 1/3 stop better exposure pays dividends in slide film. For especially important images you may wish to bracket +/- 1/3 or 2/3 stops.
Some photographers have reported up to an extra stop of dynamic range with the new Ektachrome E100. If true this would be good news. It may bear some experimenting for those with a generous film budget. I would love to hear some credible evidence for or against this assertion.
Summary
So what have we learned about metering slide film?
1. Slide film has a limited dynamic range of about five stops or five zones.
2. Slide film handles overexposure poorly.
3. Slide film makes underexposed parts of the image black and this is generally preferable to overexposing.
4. Slide film does not work well with bright light and deep shadows like a bright sunny day (high contrast scenes). It may be best to use color negative film for those circumstances.
5. In general meter the highlights and place them in Zone VII and let the shadows fall where they will.
6. Use a GND when possible to reduce the range of light in a scene with too much contrast.
Click below for the next section…
 Doug Morse